Ensuring your bicycle disc brakes are properly adjusted is crucial for both safety and optimal performance. Well-tuned brakes not only provide peace of mind but also enhance the overall riding experience, allowing for precise speed control and reliable stopping power.
In this guide, we’ll walk you through detailed, step-by-step instructions on how to adjust bicycle disc brakes, ensuring they respond effectively when you need them most.
Whether you’re a seasoned cyclist or new to the sport, mastering the art of brake adjustment can significantly improve your ride quality and safety on the road or trail. Stay tuned as we break down the adjustment process into simple, actionable steps.
Types of Disc Brakes
Disc brakes, essential for vehicle safety, come primarily in two types: mechanical and hydraulic.
Mechanical disc brakes, operated by a cable system, are known for their simplicity and ease of maintenance. They function through a lever force, manually applied by the driver, which is then transferred via the cable to clamp the brake pads against the disc. This type is common in entry-level bicycles and budget cars due to its cost-effectiveness.

Hydraulic disc brakes offer superior performance by utilizing a sealed fluid system. When the brake pedal is pressed, hydraulic fluid compresses the brake pads against the disc, resulting in a more consistent and powerful braking action.
This system is self-adjusting and provides a smoother feel at the pedal or lever. Hydraulic brakes are favored in high-performance vehicles and mountain bikes for their enhanced stopping power and reliability, especially under adverse conditions.
Both systems have their merits, with mechanical brakes being more user-serviceable and hydraulic systems delivering advanced control and efficiency. The choice between the two often depends on the application’s demands and the user’s preference for maintenance complexity versus performance benefits.
Signs That Your Brakes Need Adjusting
When your vehicle emits squeaking or squealing noises during braking, it’s a clear signal that the brake system requires attention. This auditory cue often indicates that the brake pads have worn down and need replacement.
Another symptom to watch for is reduced braking power, which can manifest as a longer stopping distance or a less responsive brake pedal. This reduction in performance is a safety risk and warrants immediate inspection.
Additionally, if you notice uneven brake pad wear, it’s indicative of a misalignment in the braking system, leading to inconsistent contact and potential damage. Lastly, excessive brake lever travel—the distance the brake pedal or handle must move before engaging the brakes—suggests that the brake components are out of adjustment.
Regular maintenance checks can prevent these issues from escalating, ensuring your vehicle remains safe and reliable on the road.
Tools Required for Adjustment
Before starting with the process of how to adjust the disc brakes bicycle, you should have a specific set of tools to ensure precision and safety.
- Toolkit: Must include various sizes of Allen wrenches to fit different bolt heads.
- Brake Cleaner: To remove any debris and maintain cleanliness.
- Set of Pliers & Screwdriver: For minor adjustments and fixes.
- Torque Wrench: For applying the correct tension.
- Bleed Kit: For hydraulic systems.
Keeping these tools on hand will not only facilitate proper brake adjustment but also extend the lifespan of your braking system through regular maintenance. Always remember to follow the manufacturer’s guidelines for the best results.
How to Adjust Bicycle Disc Brakes?
Follow these steps to learn how to adjust disc brakes on a bicycle:
1. Preparing Your Bike
Begin by positioning your bicycle on a stable platform to prevent any movement. Clear the area around the brakes to ensure you have unobstructed access. This initial step is crucial as it sets the foundation for a safe and efficient adjustment process. Make sure the bike is secure and won’t tip over, as this could lead to injury or further mechanical issues.
2. Inspecting the Brake Pads
Examine the brake pads closely for signs of wear or contamination, such as oil or dirt. If the pads are excessively worn or damaged, they must be replaced to maintain optimal braking performance. Clean brake pads are essential for the safety and longevity of your bicycle’s braking system.
3. Adjusting Brake Calipers
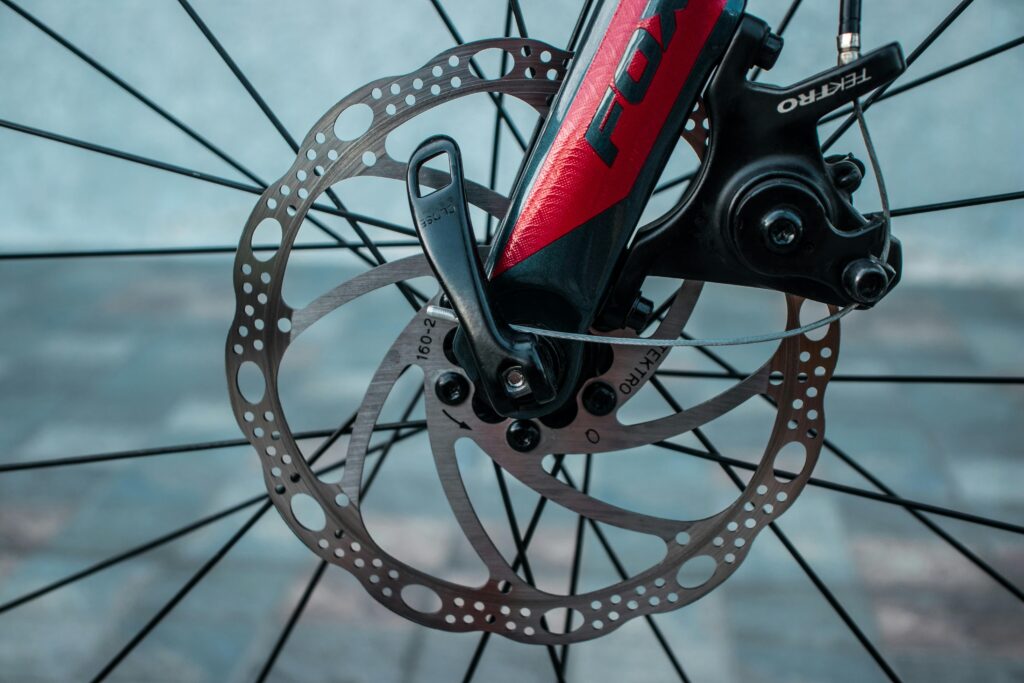
Loosen the bolts that secure the caliper to the bike frame just enough so that the caliper can move but is not completely detached. Carefully align the caliper so that it is centered over the rotor. Once aligned, tighten the bolts to the manufacturer’s specified torque, ensuring the caliper is securely fastened and properly positioned.
4. Setting Brake Pad Clearance
Using the pad adjusters, set the clearance between the brake pads and the rotor. Aim for an equal gap on both sides to prevent the rotor from rubbing and to ensure even wear. Proper clearance is vital for responsive braking and to avoid unnecessary friction that can wear down the brake pads.
5. Checking Brake Lever Feel
Squeeze the brake lever to test its firmness. If the lever feels spongy or too soft, it may be necessary to bleed the brakes to remove any trapped air within the hydraulic system. This step is important for maintaining the precision and effectiveness of your brakes.
6. Testing and Fine-Tuning
Conduct a test at a low speed in a controlled environment to ensure the brakes are functioning correctly. If you notice any issues, make minor adjustments until you achieve the desired braking performance. This final step is essential for confirming that your adjustments have been successful and that your bike is safe to ride.
Remember, regular maintenance and proper adjustment of your bicycle’s disc brakes are key to ensuring a safe and enjoyable riding experience. Always refer to the manufacturer’s guidelines for specific instructions related to your bike model.
How to Tighten Hydraulic Disc Brakes on a Mountain Bike?
Tightening hydraulic disc brakes on a mountain bike ensures optimal stopping power and safety. Begin by placing your bike in a stable position and cleaning the brake area to remove any dirt or debris.
Check the brake pads for wear; if they are thin, replace them before adjusting the brakes. Next, locate the brake caliper bolts and use a hex wrench to loosen them slightly. Squeeze the brake lever firmly to align the caliper centrally over the rotor, then retighten the bolts while maintaining pressure on the lever.
This process centers the caliper, preventing brake drag. If the lever feels spongy, air may be trapped in the system, necessitating brake bleeding. This involves using a bleed kit to flush fluid through the brakes, removing air bubbles.
Ensure the brake fluid level is topped up in the reservoir during this process. After bleeding, test the brake lever’s firmness; it should feel solid and engage the brakes promptly. For fine-tuning, turn the brake lever reach adjustment screw to set the distance from the handlebar to your preference.
Finally, inspect the rotor for true alignment, and if necessary, gently bend it back into place using a rotor truing tool. Regular maintenance of hydraulic disc brakes is crucial for mountain biking performance, providing reliable and responsive braking in various terrains.
Always consult your bike’s manual for specific instructions, and seek professional help if you’re unsure about the process.
Maintenance Tips for Disc Brakes
Maintaining disc brakes is crucial for ensuring safety and performance. Regular inspection and cleaning of brake pads and rotors are paramount. Dirt and debris can compromise braking efficiency, so keeping components clean prevents buildup that can lead to damage.
Monitoring brake pad thickness is also essential; thin pads can diminish braking power and should be replaced promptly. Additionally, ensure the hydraulic system is free of air and the fluid is at the correct level.
For mechanical systems, check that cables are not frayed and maintain proper tension. Adhering to these maintenance tips will keep disc brakes functioning optimally, providing reliable stopping power when you need it most.
Specific maintenance guidelines should always be referred to by the manufacturer.
Conclusion
Learning how to adjust bicycle disc brakes is crucial for ensuring a safe and enjoyable riding experience. Properly calibrated brakes not only provide reliable stopping power but also prevent premature wear and tear.
It’s essential for cyclists to routinely check and fine-tune their disc brakes. This practice maintains optimal performance and safeguards against potential brake failure. Remember, regular maintenance of your bicycle’s disc brakes is a small investment that pays off by keeping you secure on your cycling journeys.
So, take the time to adjust your brakes correctly and ride with confidence.
FAQs
Enhance responsiveness by cleaning the rotors, replacing brake pads, and ensuring proper caliper alignment.
Tighten hydraulic disc brakes by adjusting lever reach, bleeding the system, and ensuring proper pad engagement.
Brakes not gripping could be due to worn pads, dirty rotors, or misaligned calipers. Inspect and correct these issues.
Check your brakes at least once a month or after any intense rides, accidents, or noticeable changes in performance.


