Hydraulic bike brakes are a critical component for cyclists, offering superior stopping power and control compared to mechanical systems. Bleeding these brakes—a process of removing trapped air from the lines—ensures optimal performance and reliability.
Air pockets within the hydraulic system can lead to spongy brake feel and diminished responsiveness, which, in turn, compromises safety. Regular maintenance of hydraulic brakes, particularly bleeding, is vital for any rider looking to maintain peak performance and ensure a safe cycling experience.
This essential upkeep not only preserves the integrity of your bike’s braking system but also instills confidence during rides, allowing for precise speed management and effective stopping when it matters most. But how to bleed hydraulic bike brakes?
Understanding Hydraulic Brakes
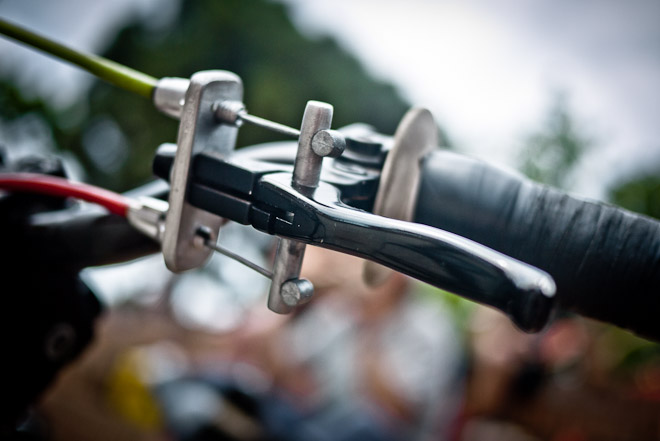
Hydraulic brakes operate by transferring force from the pedal to the brake calipers through brake fluid within sealed hoses, ensuring efficient stopping power. This system’s core components include the master cylinder, which dispatches fluid, and the calipers, which clamp the brake pads against the rotors to slow the vehicle.
Unlike mechanical brakes, which rely on cables and can stretch or snap, hydraulic systems offer consistent brake feel and superior modulation, allowing for precise control. Additionally, hydraulic brakes self-adjust for pad wear and are less susceptible to performance issues from dirt or weather, making them a reliable choice for modern vehicles.
This technology provides drivers with enhanced safety and a smoother driving experience.
When to Bleed Hydraulic Brakes?
Bleeding hydraulic brakes is crucial for optimal performance and should be done after new brake installation, as this ensures any trapped air is removed. It’s also necessary when there’s a noticeable decline in brake responsiveness, indicating potential air or moisture in the lines.
The presence of air bubbles can lead to a spongy brake feel, compromising vehicle control. Regular maintenance, including periodic bleeding, can prevent these issues, maintaining the integrity of the braking system.
This routine care is essential for safety and preserving the longevity of the brakes, ensuring they function effectively when you need them most. Adhering to a maintenance schedule will keep your hydraulic brakes in top condition.
Gathering the Necessary Tools and Materials
To bleed hydraulic bike brakes effectively, you’ll need the following set of tools and materials:
- Brake Fluid
- Clean Rags
- Brake Bleed Kit
- Set of Allen Wrenches
- Tubing and Catch Bottle
With these items, you’re ready to maintain your brakes’ responsiveness and longevity.
How to Bleed Hydraulic Bike Brakes?
Follow this step-by-step guide to find out how to bleed bike hydraulic brakes:
1. Preparation
Begin by stabilizing your bicycle on a work stand. Remove the wheel to access the brake system freely. Adjust the brake lever so it’s parallel to the ground, which will prevent air from being trapped in the system.
Ensure the caliper is also easily accessible. This setup is crucial as it allows for a smooth workflow and prevents any brake fluid from spilling onto the bike’s frame or components, which could damage the paint or cause corrosion.
2. Attach Tubing
Take your bleed kit and firmly attach the tubing to the caliper’s bleed port. Make sure the connection is secure to prevent any leakage of brake fluid. Make sure the other end of the tubing is placed in a catch bottle.
This setup is designed to ensure that old fluid and air can be safely removed from the system without creating a mess.
3. Open the Bleed Valve
Carefully loosen the bleed valve on the caliper. To avoid damaging the valve, you should do this gently. Opening the valve will allow the old brake fluid and any trapped air to escape, which is essential for maintaining the efficiency of your braking system.
4. Pump the Brake Lever
Actuate the brake lever repeatedly to push the old fluid through the system. Keep an eye on the fluid level in the reservoir to ensure it doesn’t run dry, which could introduce more air into the system.
This process helps to remove any air bubbles that may have been trapped in the lines, which can cause a spongy feeling in the brakes.
5. Top-Up Fluid
As you pump the lever and fluid levels drop, add fresh brake fluid to the reservoir. It’s important to use the correct type of fluid specified by your brake manufacturer. This step ensures that your brake system is filled with clean fluid, which is essential for optimal brake performance.
6. Close the Bleed Valve
Once you see a steady stream of fluid without any air bubbles, it’s time to close the bleed valve. Tighten it securely but be careful not to overtighten, as this could strip the threads. This step seals the system and prevents any air from re-entering.
7. Repeat for Other Brake
Now, repeat the entire process for the other brake. It’s important to bleed both brakes to ensure consistent performance. This step ensures that both brakes are equally effective and responsive.
8. Test Brakes
After bleeding both brakes, reinstall the wheel and test the brakes. The lever should feel firm and responsive. If there’s any sponginess, you may need to repeat the bleeding process to remove any remaining air bubbles. This final step is crucial to ensure your safety on the bike.
Remember to always dispose of the old brake fluid responsibly and clean any spills immediately, as brake fluid can be corrosive.
Tips for Successful Brake Bleeding
For successful brake bleeding, avoid common errors like not keeping the reservoir topped up, which can introduce air into the system. Ensure all connections are secure to prevent fluid leaks.
If brakes still feel spongy after bleeding, check for air in the calipers or master cylinder. Sometimes, multiple bleeding cycles are needed to remove all air bubbles. Use only fresh, manufacturer-recommended brake fluid, as old or contaminated fluid can degrade performance.
Keep the work area clean to avoid dirt entering the system. Following these guidelines will help maintain the effectiveness of your hydraulic brakes and ensure a firmer pedal feel, enhancing your vehicle’s safety and your peace of mind.
How Often Do You Need to Bleed Hydraulic Bike Brakes?
Bleeding hydraulic bike brakes is a maintenance task that should be performed at least once a year or whenever you notice a decrease in braking performance. Frequent riders or those in harsh environments may need to bleed their brakes more often.
It’s also advised to bleed brakes after any significant impact or accident, as this can introduce air into the system. Regular bleeding keeps the brake system responsive and ensures safety. By adhering to this schedule, riders can prevent brake fade and maintain peak performance.
Always consult your brake manufacturer’s guidelines, as some systems may have specific maintenance intervals for optimal operation. Remember, well-maintained brakes are key to a safe and enjoyable riding experience.
How to Bleed Shimano Disc Brakes?
Bleeding Shimano disc brakes is a straightforward process that ensures optimal performance and safety. Begin by mounting the bike securely and removing the wheel. Attach the bleed funnel to the lever and fill it with the recommended hydraulic fluid.
Pump the lever to remove air bubbles, then close the system at the caliper end before releasing any trapped air at the lever. Repeat the lever action until fluid movement is bubble-free.
This routine maintenance keeps brakes responsive and prolongs their lifespan, crucial for cyclists who demand reliability and precision from their braking systems. Always refer to the manufacturer’s guide for specific instructions tailored to your brake model.
How to Bleed Your MTB Brakes?
Start by securing your bike and gathering the necessary tools: a bleed kit, fresh brake fluid, and gloves. Attach the bleed tube to the caliper’s valve, placing the other end in a container to catch old fluid.
Open the valve and pump the lever to expel air and fluid, watching for bubbles. Add new fluid steadily, keeping the reservoir topped up. Once the fluid runs clear, close the valve, clean any spills, and test the brake response. Proper bleeding improves brake efficiency and your riding experience.
Conclusion
Hope you’ve learned how to bleed hydraulic bike brakes to ensure your safety on the road. This process removes air bubbles that can compromise brake efficiency, providing a firmer and more reliable lever feel.
Regular maintenance of your brake system not only enhances the riding experience but also extends the lifespan of the components. Riders are encouraged to perform this task periodically or consult a professional to ensure their brakes are in top condition.
By doing so, cyclists can enjoy a smoother ride with the confidence that their brakes will perform when needed most. Remember, well-maintained brakes are the backbone of a safe cycling journey.
FAQs
To bleed without a kit, use a clear tube, bottle, and brake fluid; manually pump fluid through the system to remove air.
Detect by a spongy lever feel and reduced braking power; listen for air bubbles when pressing the lever.
Bleed annually or when you notice decreased braking performance or air in the system.
Bleed by yourself to ensure they’re properly maintained for safety and performance; it’s cost-effective and a valuable cycling skill.